Wednesday, January 16, 2013

VIN Plate Cleaning

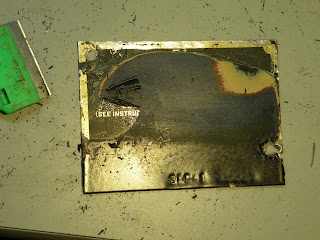
I was a little annoyed that one of the previous owners of my truck had painted over the VIN plate on the door frame, it's a simple thing to remove why cover it up.  I removed the plate from the door frame and began sanding the top layer of paint off. I hoped to find some raised lettering and if I was careful maybe be able to read it. I began with 150 Grit, then used 220, then steel wool. As I sanded I went back and forth between the grits. Eventually I sanded near the edge and noticed a definite straight black edge starting to form. I stopped using the sandpaper and steel wool.   You can see from the first picture there were many colors. Black, Metallic Blue, Red (probably a primer) White, Black, Gray (probably another primer).   I then began using razor scrapper and started shaving the paint, being very careful to keep the cutting edge very flat. I noticed some of what I thought was some gold lettering  (turns out it was the Chevy Bowtie). I worked my way around and found the letter "S" next. By this point it was 11 p.m. but I couldn't stop myself and I worked on it for the next 1 hr+. You can see my progression in the pictures below. I'm kicking myself because at one point I thought a little steel wool could clean off the paint on the word "GROSS". Unfortunately as you can see in the third picture I wiped some of the word "MOTORS" away.  I finished up with sandpaper and Steel wool to remove the paint embedded in the Serial No.  Using this tool VIN Buster I was able to determine the following information. I hoped I would be able to determine the original color of the truck, however with SN I should be able to do more research and find out. There is no paint on the door frame where the VIN plate attaches.

Serial #  : 3HP131904
Mfg Year  : 1950
Model     : 3100 1/2 ton
Wheelbase : 116 inches
Plant     : St. Louis, MO
Starting to clear off 7 layers of paint

Getting real excited now "a little too much"


All Cleaned, "well as much as it's going to get"

Saturday, January 12, 2013

My Chevy 3100

This is my 1950 Chevy 3100 1/2 ton pickup truck. The engine is a 235, with a 3 speed manual transmission. It still has the torque tube and original rear end.  The pictures on this post were taken by the previous owner.   The previous owners did some work on the engine giving it a new carb, coil, plugs, distributor, starter, and manifold gaskets. One also put in a new gas tank. The front end has a speedway drop axle and new drag link.  The transmission leaks,  and the engine is leaking oil up front somewhere. The previous owner had also purchased a T5 transmission,  drive shaft, and picked up a rear-end from a 66 1/2 ton Chevy with a 3.73 rear end. These were all included in the purchase. I haven't decided if I'm going to use them or rebuild the rear end with a new pinion and ring.


While I figure out what to do with the Engine and transmission, I'll be doing some body work. I signed up for  an evening auto body class at the local Vo-Tech high school. I'll be taking the drivers side front fender off and will pick up a patch panel, then cut out the rusted section and weld in the patch. The welding class I took  two years ago will come in handy. I have also picked up a pair of running boards, the driver side running board had a bad Bondo job done to it. I figured replacing it would be easier than trying to grind out the Bondo. The replacements are solid with no holes and will only need to be stripped, and painted.


Friday, January 11, 2013

Ramp Construction

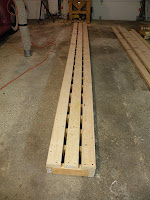
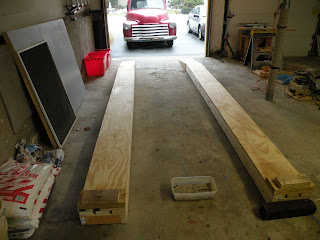
 Here's my truck a 1950 chevy 3100 half ton. one of the previous owners "paint bombed" it a cranberry red. The truck has been lowered and is so low I couldn't get under it. The truck is registered and tagged. I didn't want to jack it up every time I needed to get under it, I want to do my best to keep it  running while I repair it. Thus I decided to build some ramps long enough to drive up on and sturdy enough to feel comfortable going under the truck. As you can see I only have 8" clearance above the truck. I decided to build the ramps 5 3/4 inches high. The main structure is made from 2x4's and 3/4" plywood. This page pretty much shows the construction. I think I spent more on deck screws than on the wood. Approx cost was about $150. I do get nervous when I drive up on them If I were to do it again I would make them 15" or 18" wide instead of 12". The design makes it simple to add on if I really need it I can easily make it wider by screwing some 2x4's to one side and build it up the same way.

In the garage 8" overhead clearance

12'L x 12" W, each cross piece is 9"
Screw 3, 12' 2x4 across the top


Cut a 42" 2x6 from corner to corner
 to get to equal sides
Add a layer of 3/4" plywood across the top

Finished product, Add a couple of stop blocks from scratch